|
|
||||||
|
|
|
|
Download | |||
Diamond Version 5 User Manual: Automatic, assisted, and manual picture creationPicture Creation AssistantThis optional assistant helps you to create or modify a structure picture in a few steps
In this article:
Previous article: Automatic vs. manual picture creation OverviewThe Picture Creation Assistant is a versatile tool that guides you through the individual steps of creating and designing a picture. It can be applied to a new blank picture as well as to an existing picture, e.g. to change a 3D rendered representation to a black-on-white printout. It offers the most common building functions such as:
Besides this it offers basic functions for the structure picture display and the viewing direction:
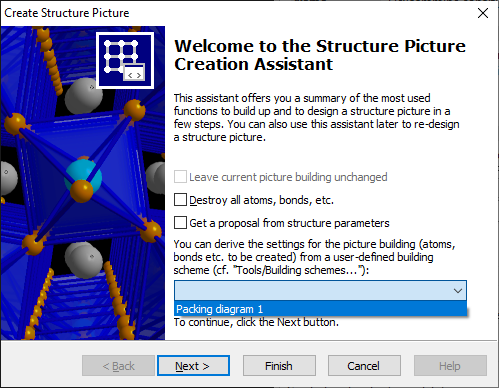
The Picture Creation Assistant is available from several commands that create a new structure data set or import data from a foreign file format and helps you to create your first picture or helps you to create a second, third, etc. one. It can be called directly from the Picture main menu using the Picture Creation Assistant command in order to start from a blank picture or to modify an already existing picture. Where to start fromThe Picture Creation Assistant is a multi-page dialog. On the first of it, the Welcome page, you decide to start your building from scratch or to make use of a building scheme or from a proposal of Diamond basing on the structural parameters.
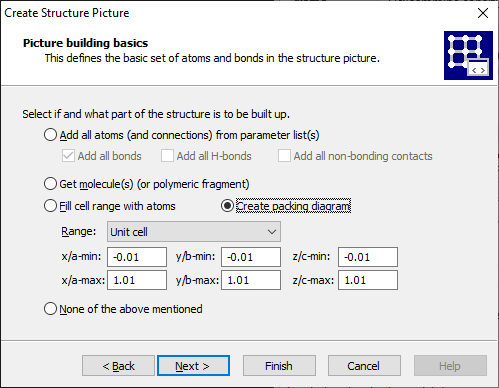
If you call the assistant for a structure picture that has content - either built up manually or automatically with a proposal of Diamond, you have the choice to leave the current picture building unchanged. The Leave current picture building unchanged checkbox is set whenever you call this dialog for an already existing structure picture building. Leaving the checkmark set or setting it will directly lead you to the picture design settings page of the assistant. If you decide to change the picture building -- or the picture is still empty --, you have the choice to select a building scheme from the combobox titled You can derive [...]. Or set the checkmark at Get a proposal from structural parameters, this is the building scheme suggestion from Diamond basing upon structural parameters. If you choose the proposal or a building scheme, the following pages referring to the picture building settings will then reflect the content of the selected building scheme. Note: Building schemes are handled in one of the following articles. The article "Optimizing the Representation of the Structure Picture" describes how to apply the Picture Creation Assistant to modify an already existing picture, e.g. for publishing. The Next button brings you to the basic building options, if you start from a blank picture (or destroy existing picture contents), or directly to the first design settings page. Basic building functionsOn the second page of the assistant you decide about the so-called "picture building basics" (or "primary atoms"), i.e. which atoms shall be created before any of the building operations on the following pages of the assistant are carried out. In the general case (meaning if we did not use the "Packing diagram 1" building scheme on the Welcome page), the default basic settings are to fill the contents of the unit cell. For the screenshot below we change the Range option to "Quadruple cell XY", filling the unit cell as well as three neighbouring cells. The boundaries in crystal coordinates are adjusted as well.
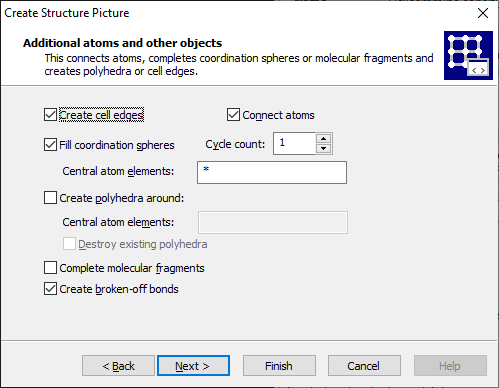
Other options are: Adding all atoms (and optionally bonds, H-bonds, and contacts) Creating molecules directly from the atomic parameter list Creating a packing diagram Creating no basic atoms Note: All building options in the Picture Creation Assistant are also available through corresponding manual building functions. The section "Building up structural parts" of the Diamond User Manual describes the functions to build up a structure in more details. On the next page you define, if and how far to add cell edges, bonds, or polyhedra to the picture building. Adding additional atoms, bonds, or polyhedraOn the third page of the assistant you can define additional atoms and bonds as well as cell edges and coordination polyhedra on top of the previously defined basics:
There are several options that can be used in combination: Creating cell edges Connecting atoms Filling coordination spheres Creating coordination polyhedra Completing molecular fragments Creating broken-off bonds The page opened by clicking the Next button defines the drawing target and the basic design of atoms and bonds. But below we first explain the option to create a packing diagram. Creating a packing diagramA packing diagram is generally more appropriate for crystal structures consisting of finite molecules than for three-dimensional frameworks. If you choose Create packing diagram as building basics, you define the size of the cell range with the Range checkbox or with the six fields X-min through Z-max. (The default cell range is the unit cell.) Diamond fills the cell range with molecules and/or vagabonding atoms and/or atoms of polymeric structural parts. The choices how and which molecules to include in the cell range will then follow on the subsequent page of this assistant.
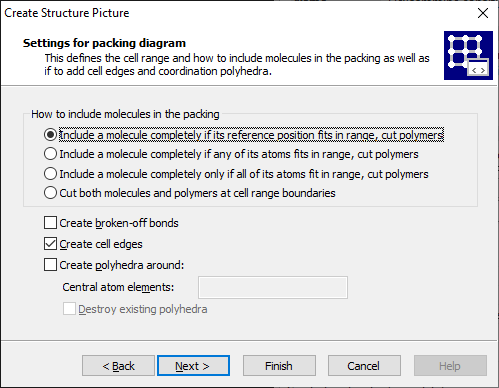
If you choose Create packing diagram as building basics, the assistant will lead you to an alternative third page with special settings for the packing diagram. Otherwise the third page is the (above mentioned) page "Additional atoms and other objects", that means if and how to fill coordination spheres, create polyhedra, connect atoms, etc. The How to include molecules in the packing group of options (radio buttons) defines if and how to include or cut molecules in the cell range given on the previous page of the assistant:
Include a molecule completely, if its reference position fits [...]
Include a molecule completely, if any of its atoms fit
Include a molecule completely only, if all of its atoms fit
Cut both molecules and polymers at cell range boundaries The other options Create broken-off bonds, Create cell edges, and Create polyhedra around work in the same way as described above under "Adding additional atoms, bonds, or polyhedra".
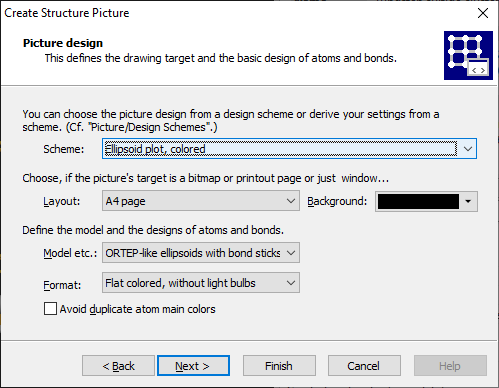
Defining the picture designThe fourth page handles the picture design. Here you define the basic design settings of the picture like the model, the layout (bitmap, A4 page etc.) and the format (rendered representation, gray-scaled etc.). It also allows you to choose a design scheme (cf. article "Definition and application of design schemes (style sheets)"). If you want to use a design scheme, choose one from the combobox Scheme. The settings below will adjust to the corresponding settings defined in the selected scheme. The screenshot below uses the design scheme "Ellipsoid plot, colored", which is defined in the article "Definition and application of design schemes (style sheets)" in the chapter "Scenario 2: Quick definition and application of a design scheme". If you do not want to use a design scheme, choose the option "(No design scheme)". (This or simply a blank field is the default option.)
Model etc. Layout
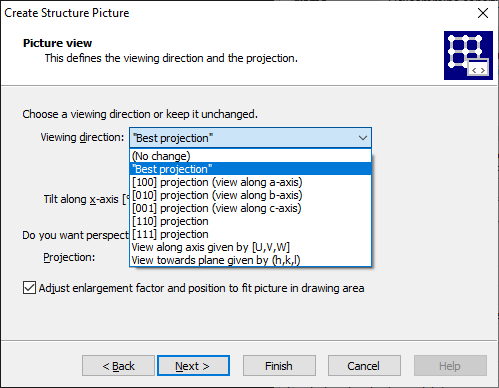
Note: If you would like to change the layout without the assistant later on, please select the Layout... command in the Display menu. Format Note: The picture design and viewing options in the Picture Creation Assistant are also available through corresponding manual functions. The section "Display of structure picture" of the Diamond User Manual describes these functions in more details. Choosing viewing direction and projectionOn the fifth page of the Picture Creation Assistant you define the viewing direction, i.e. the orientation of the crystallographic axes a, b, c (or the axes of the orthogonal coordinate system, if it is not a crystal structure) relative to the axes of the view coordinate system. Besides this you can choose between parallel and central projection (perspective) and if to adjust the structure picture's dimensions automatically to the boundaries of the drawing area. Note: The articles "Projection" and "Orientation and position" describe in more details how a structure picture is projected to the drawing area.
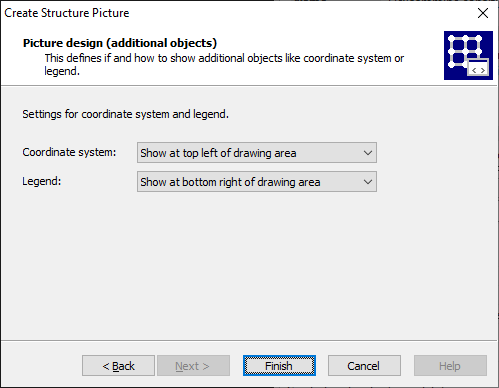
Viewing direction If you choose to view along a crystallographic (or orthogonal) axis or a special axis or towards a plane, you can rotate the structure picture for some degrees by defining the angles in the Tilt [...] input fields. Projection Adjust enlargement factor and position to fit... Defining additional objectsThe sixth (and last) page of the Picture Creation Assistant can be used for additional objects like the legend of atom types and the coordinate system showing the current orientation:
For both legend and coordinate system you have the choice to leave the current settings unchanged, to switch the legend or coordinate system, rsp., on or off (and leaving the position unchanged), or use "Show at ..." to show the object at a special position relative to the boundaries of the drawing area. You can switch to the previous page (viewing direction) of the Structure Picture Creation Assistant or to any of the previous pages using the Back button and come back using the Next button. The Finish button closes the assistant and performs all currently selected building and design operations. Note: The result of this operation will depend on the settings on all pages of the assistant, even if you have not visited them yet.
Previous article: Automatic vs. manual picture creation
|
|
Page last modified September 28, 2023. Copyright © 2023 Crystal Impact GbR. All rights reserved. Contact Webmaster |