
|
|
||||||
|
|
|
|
Download | |||
Diamond Version 5 User Manual: Printing, copying, and exporting structure picturesPrinting a structure picture
This article gives you information about printing the structure picture: Previous article: Copying, Saving, and Printing Data from the Data Sheet or Powder Pattern
Defining the page formatThe representation of a structure picture on the screen (within the main pane of the structure window) is a little bit different from the repesentation on a printout. Unless you make use of the printout page layout, only a (centered) part of the printout page is visible in the drawing area of the structure window. You can use a grid to get the extent of the structure window or page, rsp., in centimeters.
Structure window and page view displaying the printout page for the same structure picture. The upper window displays only the centered part of the entire page.
A page format must be defined for page view, print preview, and printing itself. If you do not define a page format, Diamond uses the page format that is currently defined for the MS Windows standard printer.
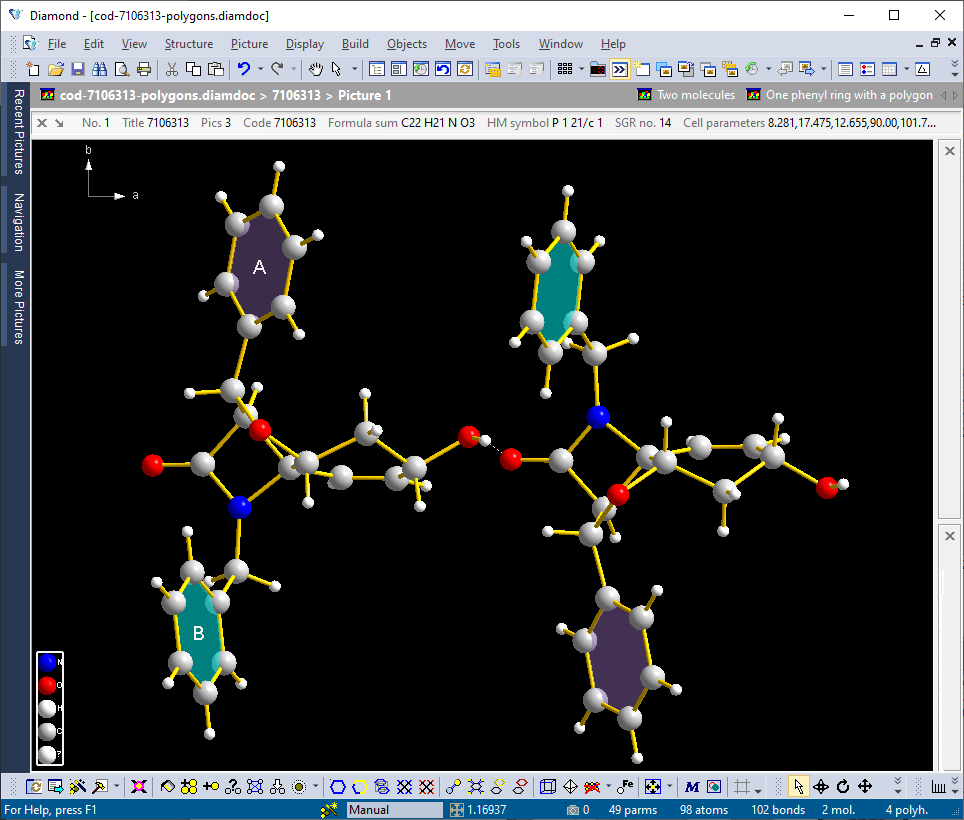
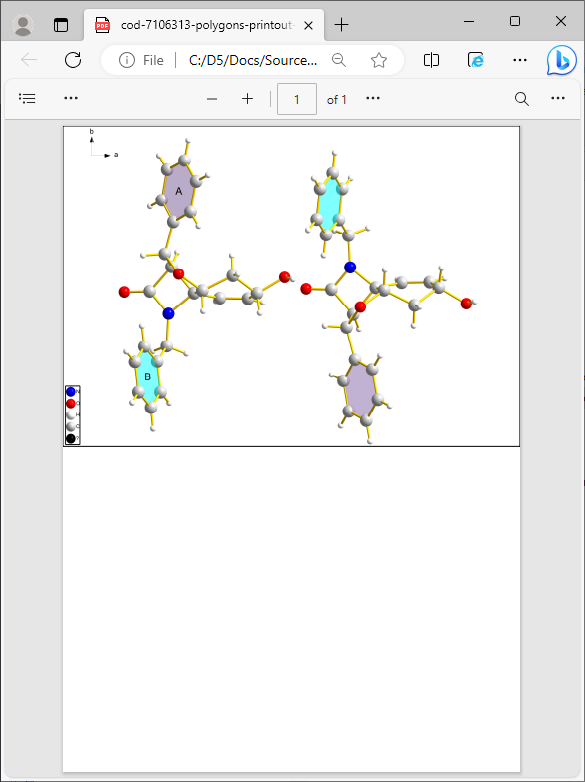
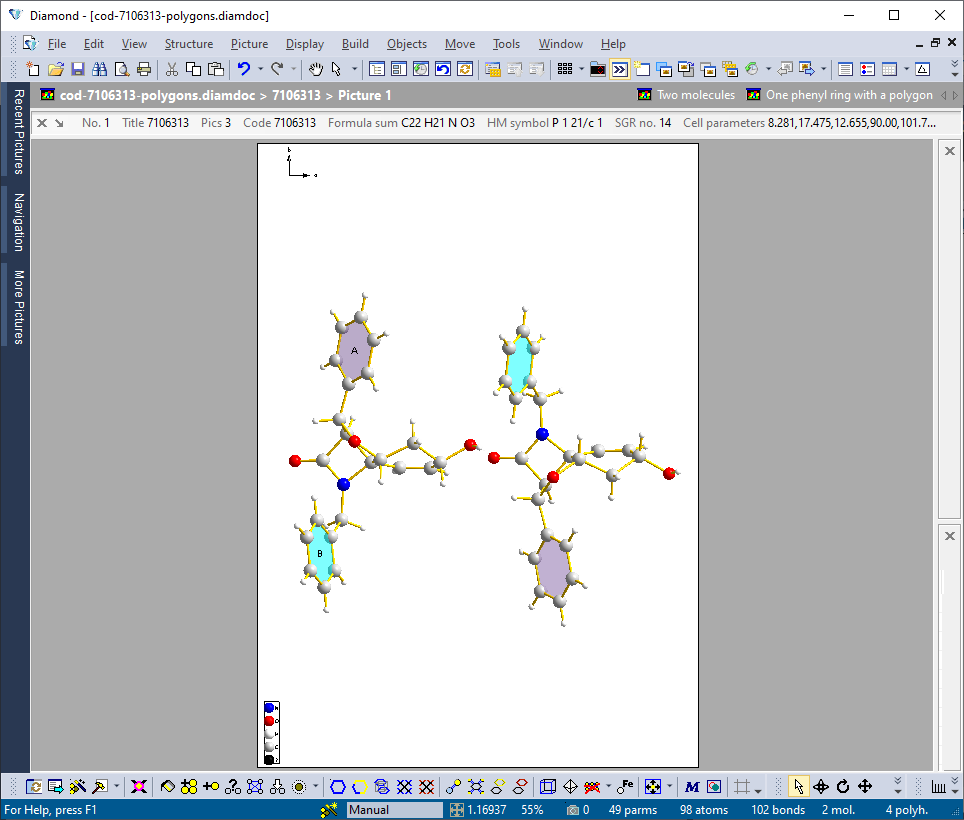
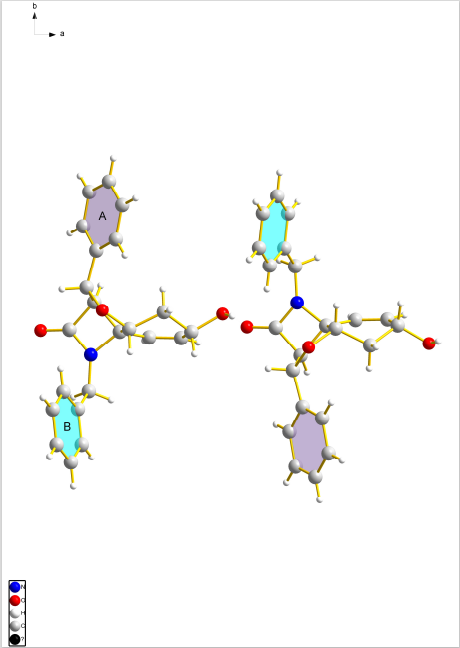
To control or change the page format or to select another printer or to change other printer settings, such as resolution, color mixing, etc., choose the Print setup command from the File menu. The contents of the Printer Setup dialog depend on your desktop system as well as on the printer driver. But in most cases, you can choose the page size (for example "A 4") and the orientation ("landscape" or "portrait"). When a structure picture is printed, Diamond normally uses the black-on-white mode, independent if that mode has been activated for the picture on the screen or not. If you want to print a picture with colored or even black background - as it is represented in non-black-on-white mode on the screen -, you must change the Use black-on-white mode for printing setting on the Background page of the Layout dialog (from the Display menu.) As shown in the article "Layout", Diamond uses a special "bitmap" layout as well as a "printout page" layout besides the (default) "window" layout. The following will show how the different layouts appear on the target printout page. Printing from window layout The first couple of screenshot shows the structure picture "Picture 1" from the sample file "cod-7106313-polygons.diamdoc" in "window" layout on the left side and the corresponding print output on the right side. Here we sent the printout to "Microsoft Print To PDF" rather than to a physical printer in order to get a screenshot of the PDF file in Microsoft Edge. Since the window is wider than high and the target page format is A4 in portrait orientation, the picture is fit to the width and aligned vertically at the top of the target page. Note that the picture has a small border by default when it is printed from window and bitmap layout. To omit this border, switch off the option "Do not print a frame around structure picture" on the Desktop page of the Options dialog (opened from Tools menu).
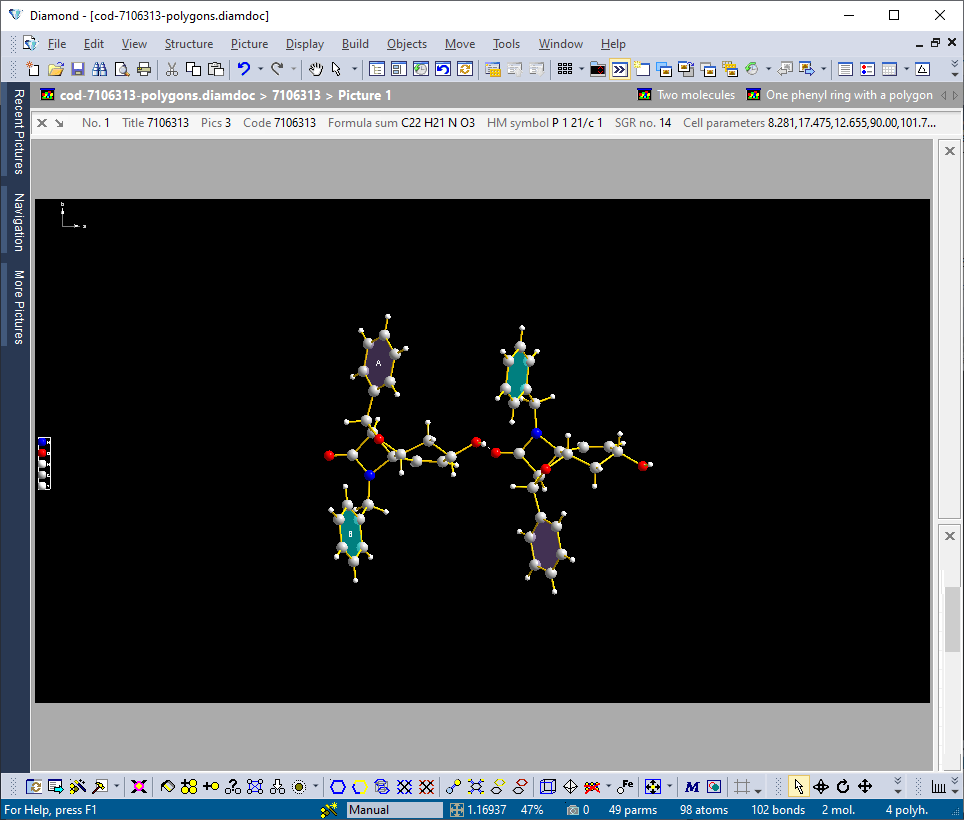
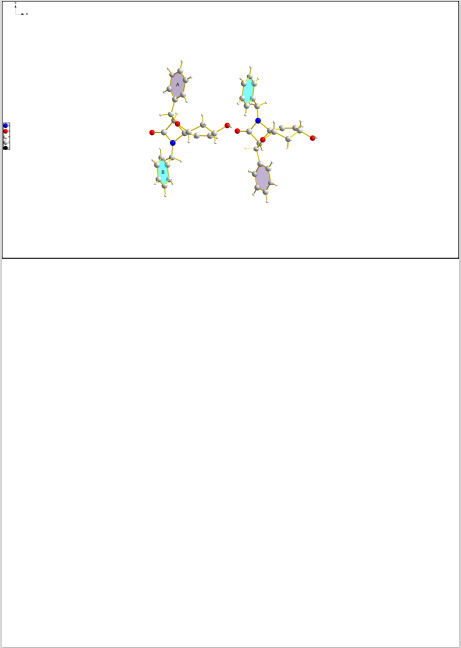
Printing from bitmap layout Here the situation is simlar to "window" layout but we use a bitmap with fixed dimensions (independent from the physical size of the picture pane), here: 1920 x 1080 pixel ("Full HD"). (The bitmap is fit into the window pane due to the default setting "Scale to fit" in the View -> Zoom dialog.) We did not adjust the picture to the (new) size of the bitmap when switching from "window" to "bitmap" layout, so there is still a lot of space around. The printout looks similar to the above one but the difference of aspect ratio between bitmap and target page is even bigger.
Using printout page layout In the third case we define a "printout page" layout. Since the printer driver uses A4 in portrait orientation as default (at least in Germany), the default page size is 29.7 cm x 21 cm. The printout matches the page shown in the window pane. Note: In Printout page layout, no frame is drawn unless the structure picture must be fitted (shrink) into the physical page. Setting the checkmark at "Do not print a frame around structure picture" in the above mentioned Tools dialog prevents Diamond from printing a frame around a structure picture in any of the layouts.
Print Preview and "Printout Page" layout to control the page formatSince a structure picture appears quite different between normal (window) layout and printout page layout and the normal layout does not represent the whole page, it is recommended to switch to printout page layout before printout or to make use of the print preview mode. For details, see "Layout". Print preview is a standard implementation in many MS Windows application that reproduces the printout on the screen. It displays the active structure picture (or other graphics like diffraction diagram etc.) as it would appear when printed. It is not limited to "printout page" layout but also works for "window" and "bitmap" layout. The following table shows the differences between printout page layout and print preview mode:
When you choose this command, the main window will be replaced with a print preview window in which one or two pages will be displayed in their printed format. There is a special control bar for zooming into or zooming out of the page. This print preview toolbar offers you options to view either one or two pages at a time; move back and forth through the document; zoom in and out of pages; and initiate a print job. Since there is just one page, "Next page" etc. take no effect. Data sheet or tables as well as properties view are hidden during print preview mode. The print preview toolbar offers you the following options to preview a structure picture printout: To enter print preview mode, choose the Print preview command from the File menu, or press the corresponding button in the standard toolbar:
Banding of rendered pictures
When printing a rendered picture, Diamond must buffer the contents of the page in a memory bitmap, which has the same resolution like the printer. For an A4 page (21.7 x 29 cm), a resolution of 300 dpi (dots per inch) and 24 bits per pixel, this requires about 26,340,000 bytes. If there is not enough main memory, MS Windows will occupy some megabytes from your hard disk. The printer driver will need another megabytes to convert the bitmap to printer commands. If your main memory and hard disk resources are getting low, you may have to wait for a rather long time and/or you will receive an error message.
To avoid these problems, Diamond makes use of so-called banding. A band is a part of the complete memory bitmap, which will be sent to the printer driver after rendering. For that reason, the drawing code must be repeated for each band, which will elongate the printing process, but is usually faster than requesting memory from the hard disk (swapping) by the operating system. The default size value for one band is 8,192 kb. You can alter this value in the input field Size of print buffer on the Desktop page of the Options dialog (Options command from the Tools menu). The optimum value depends on the size of the (available) main memory (RAM) of your system and the speed of your main processor (CPU). Smaller values increase the number of drawing operations, whereas higher values may cause swapping and decrease the system performance. If you do not want banding to be used, enter zero for the size of the print buffer. Then Diamond renders the picture in one single step to the printer.
Printing using the Print dialog
The best way to make the first printout in a Diamond session is to use the Print dialog before the printing process is started. The main reason is, that you often don't know really about the current printer selection and page format. The page view or print preview may give you hint for the actual orientation ("landscape" or "portrait") but not for the actual page size and printer selection. To print with the usage of the Print dialog, choose the Print command from the File menu, or use the "hotkey" Ctrl+P. (Do not use the printer symbol in the standard toolbar!) In the Print dialog, you have the opportunity to select another printer or change further printer settings (page size, format, etc.). Start printing with the OK button.
Printing directlyIf you know the current printer and page settings or if you want to print for the second, third, etc. time during your Diamond session,
you can simply choose the
Previous article: Copying, Saving, and Printing Data from the Data Sheet or Powder Pattern
COD:7106313: Zhongxuan Xu, Kun Huang, Tong Liu, Mingjin Xie, Hongbin Zhang;
"Synthesis of spirocyclic ?-keto-lactams: copper catalyzed process"; Chem.Commun., 47, 4923 (2011). |
|
Page last modified October 17, 2023. Copyright © 2023 Crystal Impact GbR. All rights reserved. Contact Webmaster |


 button in the standard toolbar.
This starts the printout process immediately without calling the Print dialog.
button in the standard toolbar.
This starts the printout process immediately without calling the Print dialog.